No edit summary |
No edit summary |
||
| Line 8: | Line 8: | ||
It’s important that the road is as straight as possible to the destination and doesn’t have many slopes that can slow down trucks. At the beginning of the game the money available to build the first line of trucks is limited and in most cases it is quicker to go around a mountain than try to cross it. This is because building a tunnel early in the game will reduce your budget more than the cost of going around the mountain. |
It’s important that the road is as straight as possible to the destination and doesn’t have many slopes that can slow down trucks. At the beginning of the game the money available to build the first line of trucks is limited and in most cases it is quicker to go around a mountain than try to cross it. This is because building a tunnel early in the game will reduce your budget more than the cost of going around the mountain. |
||
| − | Please note that this guide uses a unique world seed: 0cvxxihmz8 |
+ | Please note that this guide uses a unique world seed: '''0cvxxihmz8''' |
You can copy this unique seed and paste it into the New Game window to create a similar world which will only differ if you have any mods turned on. |
You can copy this unique seed and paste it into the New Game window to create a similar world which will only differ if you have any mods turned on. |
||
Revision as of 12:36, 16 July 2020
In this guide you will learn how to create your first truck route to start earning money to grow your freight transport empire.
Trucks are the cheapest way to start a game. They are cheap and require little infrastructure on short trips and with little workload. Before starting to build the first line of trucks, it is a good idea to take a look at the raw deposits in the region to start and what raw materials the different cities demand.
Once you have found the deposit that you want to extract and the city where you are going to deliver the cargo, you can start planning the new line of trucks.
It’s important that the road is as straight as possible to the destination and doesn’t have many slopes that can slow down trucks. At the beginning of the game the money available to build the first line of trucks is limited and in most cases it is quicker to go around a mountain than try to cross it. This is because building a tunnel early in the game will reduce your budget more than the cost of going around the mountain.
Please note that this guide uses a unique world seed: 0cvxxihmz8
You can copy this unique seed and paste it into the New Game window to create a similar world which will only differ if you have any mods turned on.
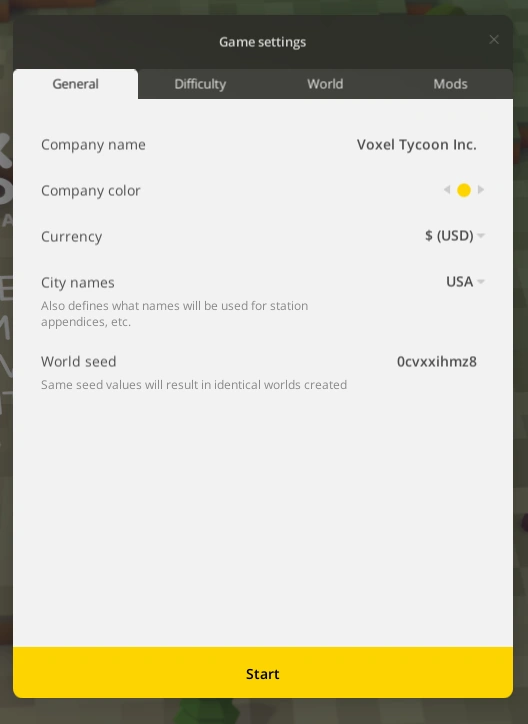 Game settings window |
Let's get started:
 Coal mine placement |
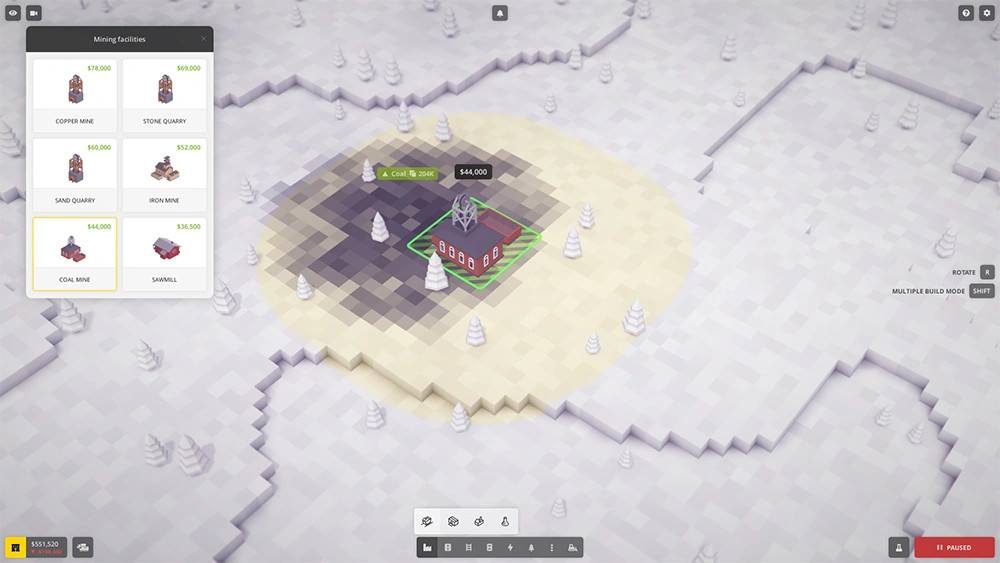
The first thing is to build a mine, in this case a coal mine that we will transport to a nearby city. At the beginning of the game, only three types of mines are available: the coal mine, the iron mine and the sawmill. In the construction menu at the bottom of the window we select the first icon on the left (Industry) and in the submenu that opens we select the first button (Mines). A window will open with the different types of mines available. Select the coal mine and put the cursor over the coal deposit. The view will change and the building will appear with an influence area of the chosen company color. This area of influence will affect the buildings that we place around it. It’s not necessary that the mine is located right in the center of the coal deposit, we can place it as long as it detects that it’s in the range radius of the coal deposit. If necessary we can rotate the building by pressing the R key if necessary and click LMB to confirm placement.
 Building truck station |
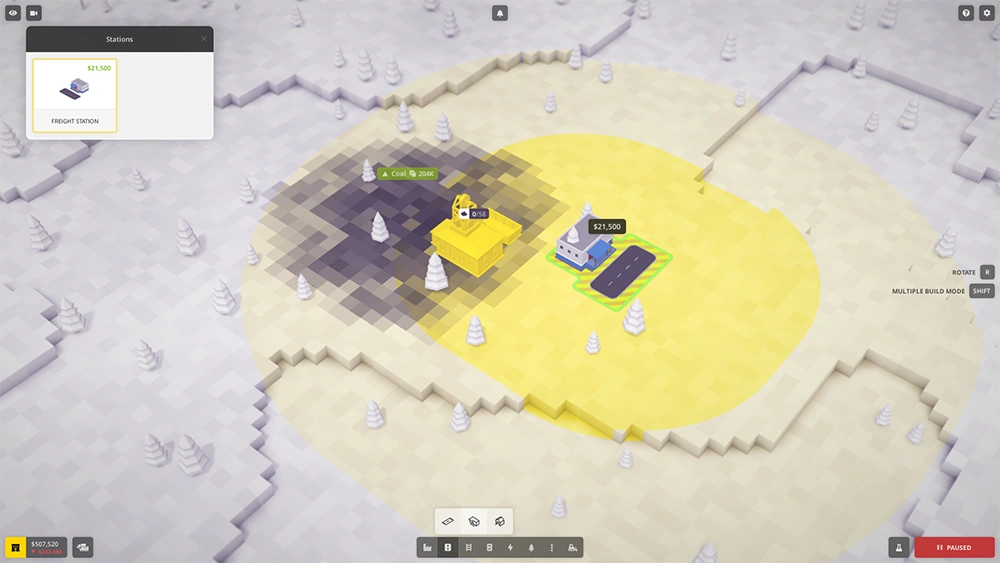
Once we have the mine built we need a truck loading station. In the construction menu select the road button and press the Stations button. A station building window will open. Select the station and place it in such a way that the mine is within the station's area of influence.
  Creating a loop |
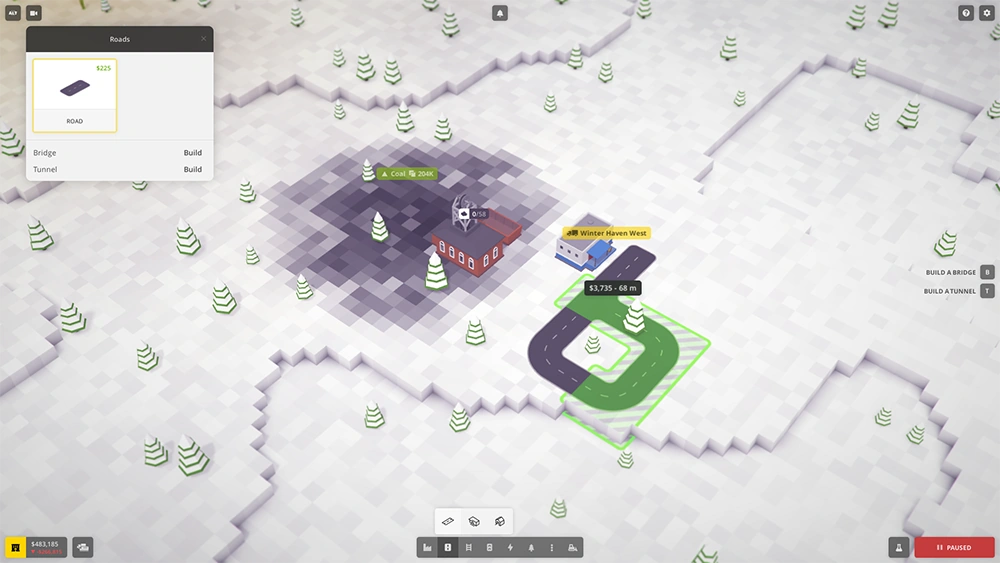
Now that we have the station we will build a small loop at the end of the station to allow the trucks to turn. It’s not necessary to build it but in certain situations it’s recommended to do it so that the trucks do not have to travel a long distance to turn around. In the construction menu select the roads button and we create the loop. Please note that there can be no road junctions at a truck loading station.
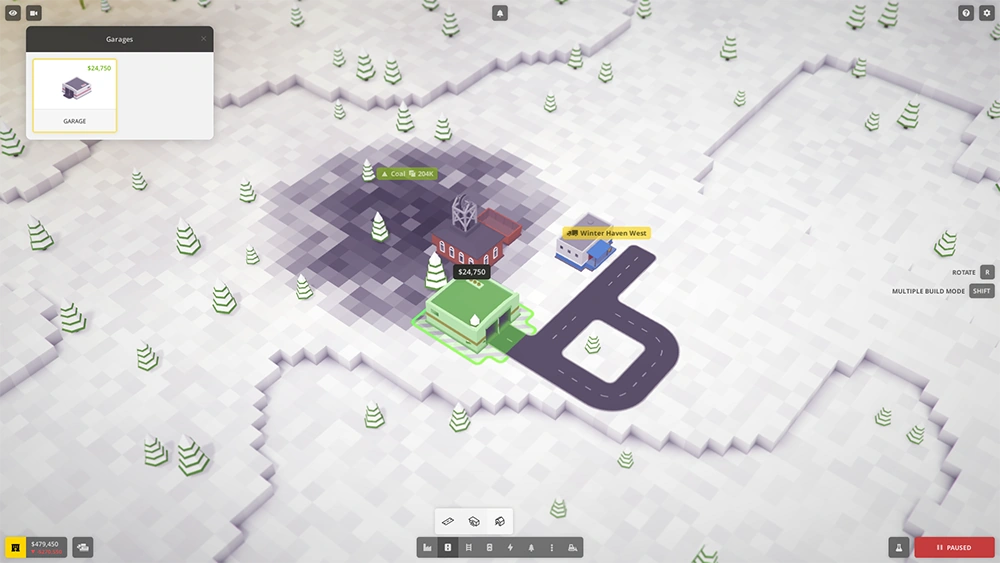  Placement a truck depot |
Now in the construction menu we select the depot and placed it at one end of the loop. It is a good idea to place the depot near the resources so that the trucks arrive as soon as possible to load. Also keep in mind which side the trucks load when placing the depot. If you put the depot on the same side that the trucks are loaded on, the trucks will need to turn around. For this reason it is also convenient to build a loop near the truck loading station.
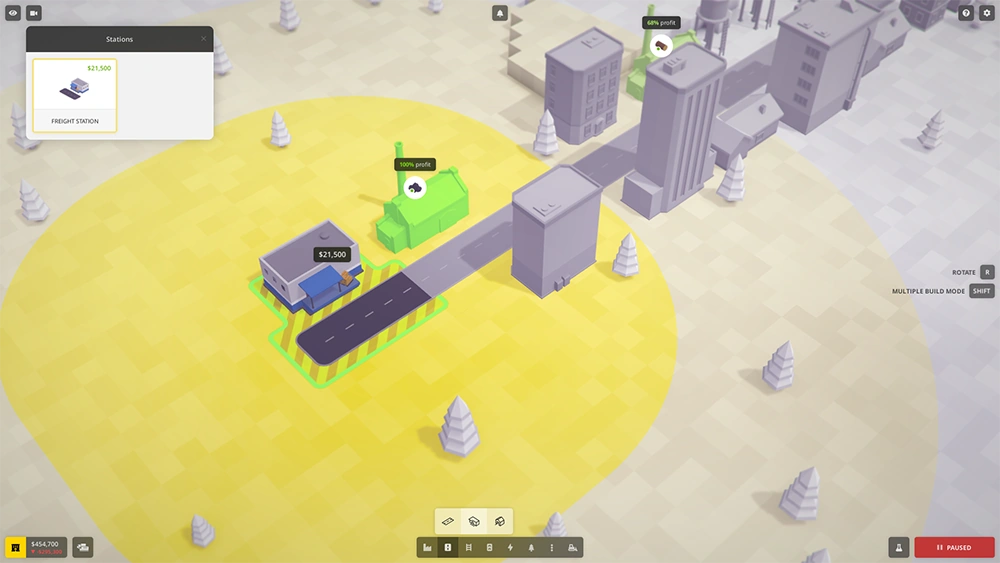  Placement destination truck station |
Now go to the city where the coal will be delivered. Place a truck loading station as close to the business that demands coal. Above the business, a message will appear indicating the percentage of profitability that depends on the distance from the truck loading station to the business.
  Extend nearby roads |
If there are no roads nearby for trucks to turn nearby, you should build or extend nearby roads to create a loop.
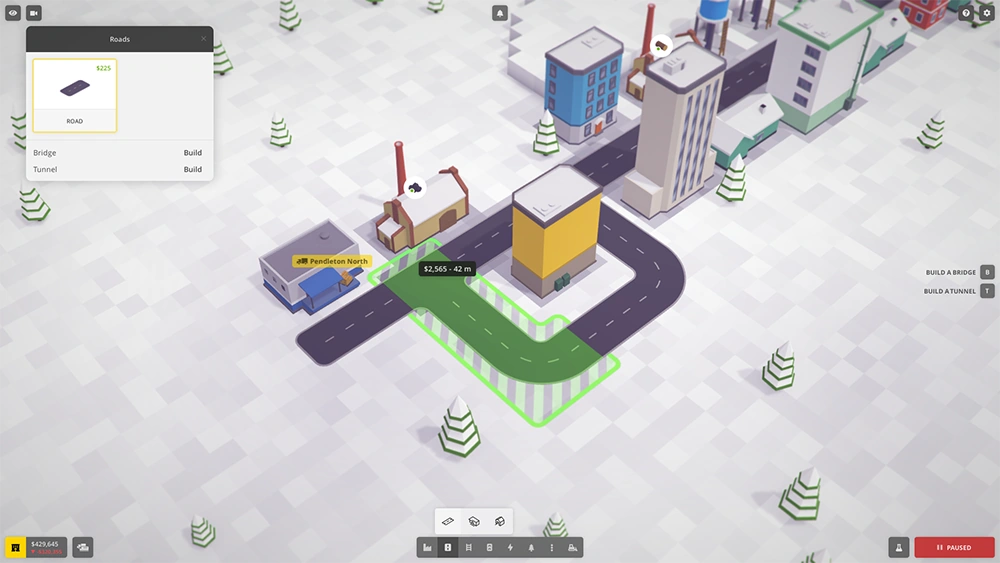
  Planning the route |
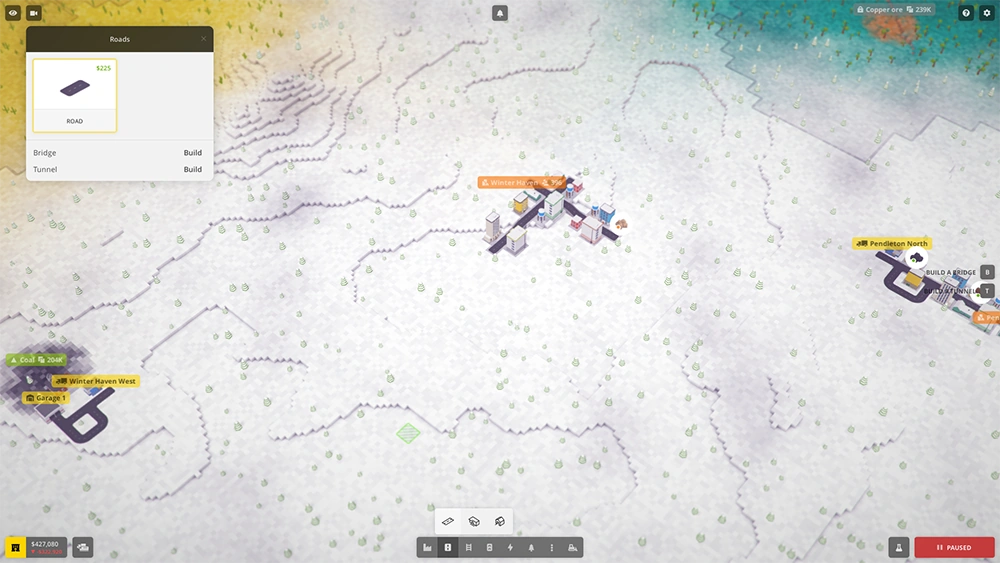
Now that the loading and unloading stations are already built, they must be connected. Zoom out to see both cities and have a good view of the land between them and plan the best route.
  Connecting stations |
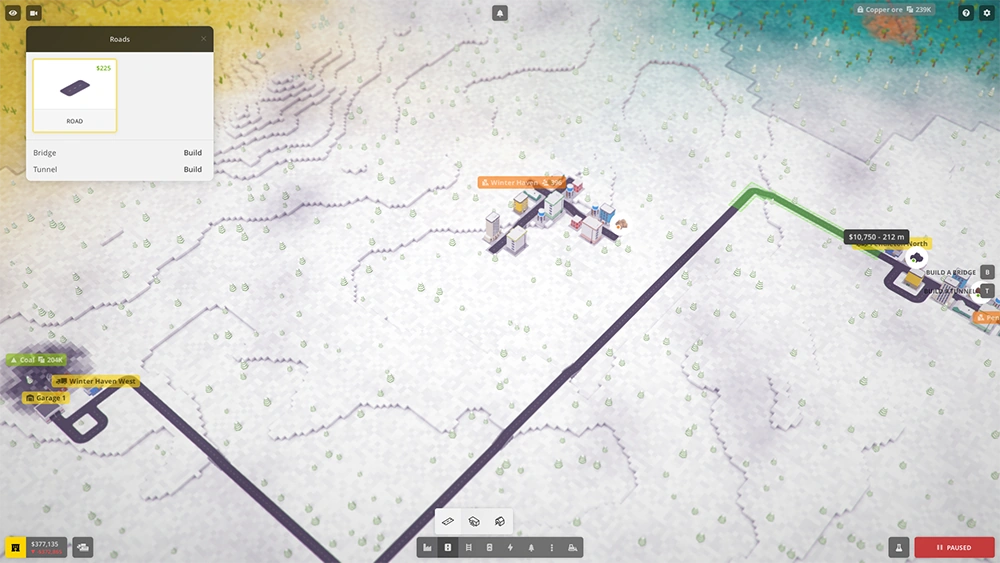
Build the road that connects the two truck loading stations trying to avoid most uneven ground and with the fewest curves possible.
  Truck depot window |
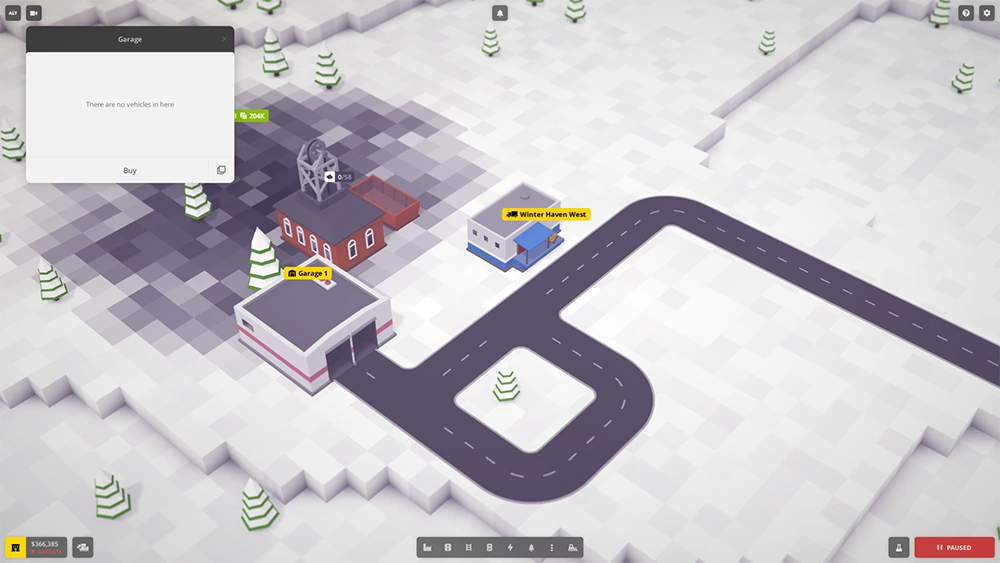
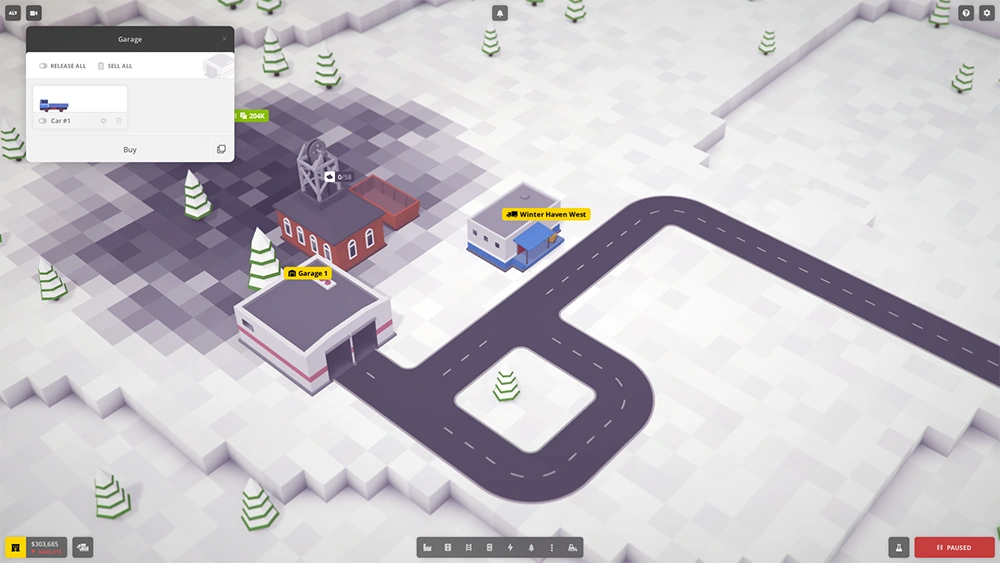
Now you have to buy trucks that can transport coal. Click on the Depot to open the Depot window and click on Buy.
  Vehicle purchase window |
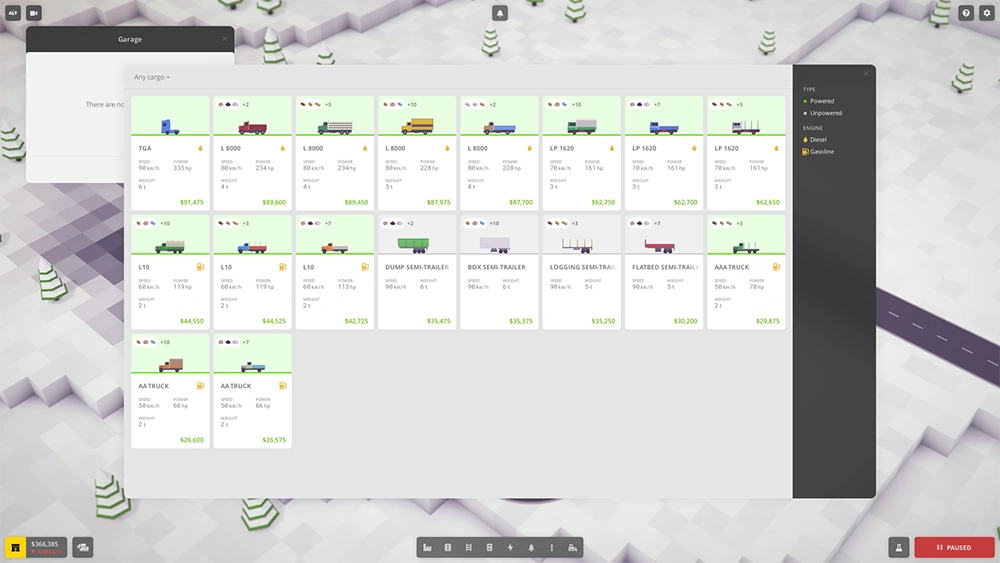
In this window are all available trucks. This screenshot shows all of the current base game trucks. At the beginning of the game, we only have three types of trucks available depending on the type of cargo they are transporting.
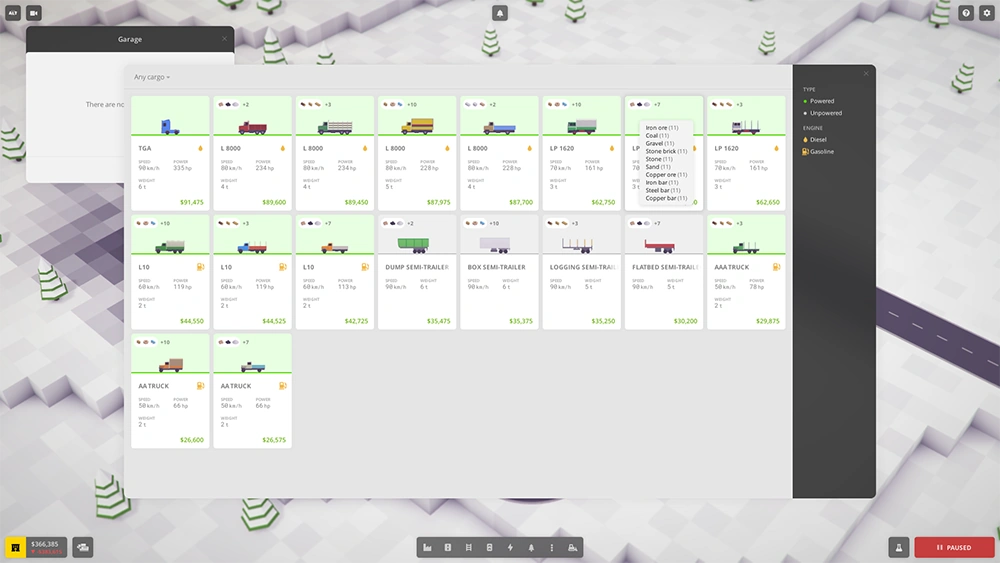  Vehicle purchase window: cargo types |
At the top of the truck tab you can see the type of cargo the truck transports. The number to the right of the icons indicates that there are more types of cargo that you can transport. Hovering the cursor above this will highlight the other types and list how many items the truck transports.
Select the white and blue AA Truck.
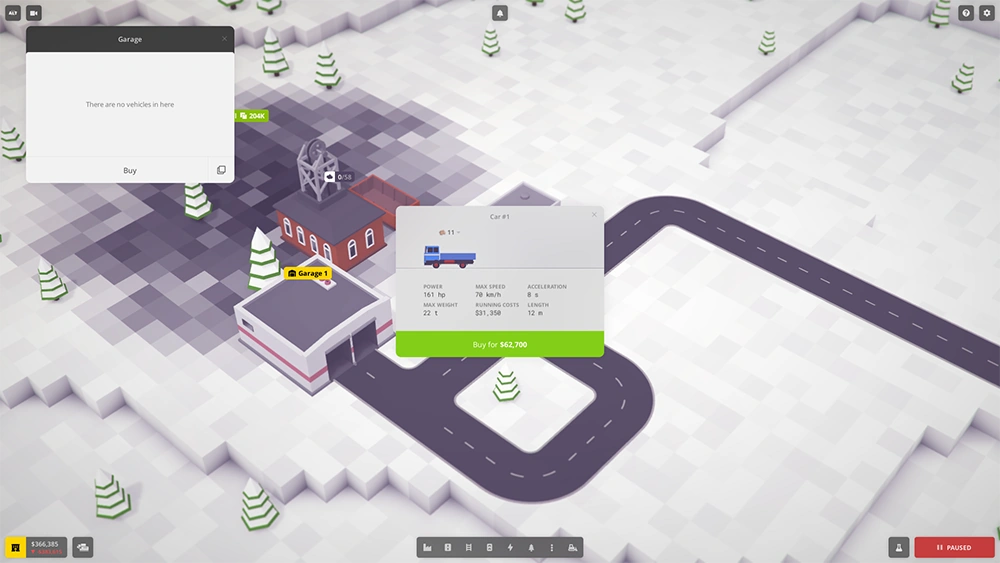  Purchasing vehicle window |
Click on the truck to open the purchase window. In this window the truck is shown, the load that it’s transporting at that moment that can be modified by clicking on the arrow next to the load icon to display a window with the possible loads that we can select. We will change this from Iron Ore to Coal.
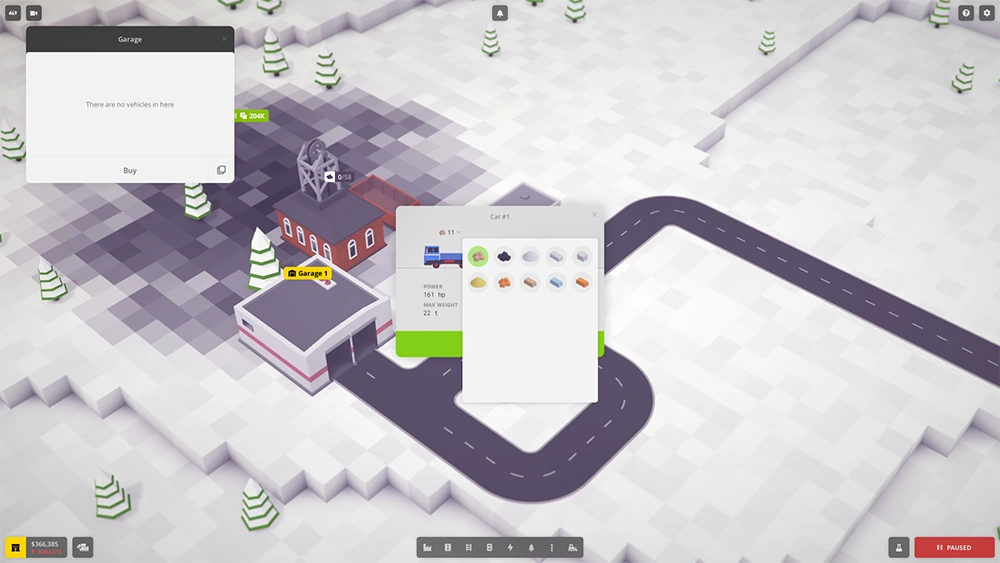  Selecting cargo type |
The amount of cargo can transport appears to the right of the cargo icon. If it’s necessary to change the cargo type, click on the cargo icon to open the cargo selection window.
Truck statistics appear at the bottom of the window. Click Buy to purchase the truck.
  Coal truck in depot |
You already have your first truck in the depot. Now you have to establish the route between the two truck loading stations.
  Vehicle schedule window |
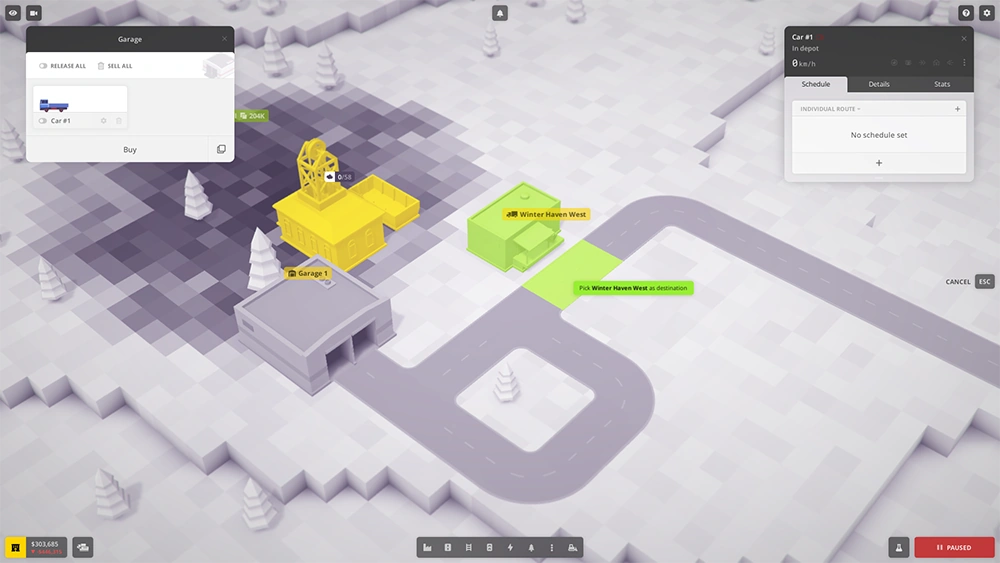
Click on the gear wheel icon at the bottom of the truck tab you just bought to open the truck settings window.
  Adding order |
Click the plus icon at the bottom of the window and select Full Load to add the new order.
  Selecting start station |
The view will change and the truck loading station will be highlighted in green and the buildings that are in the area of influence will be highlighted. Click on the truck loading station to add the order.
  Selecting destination station |
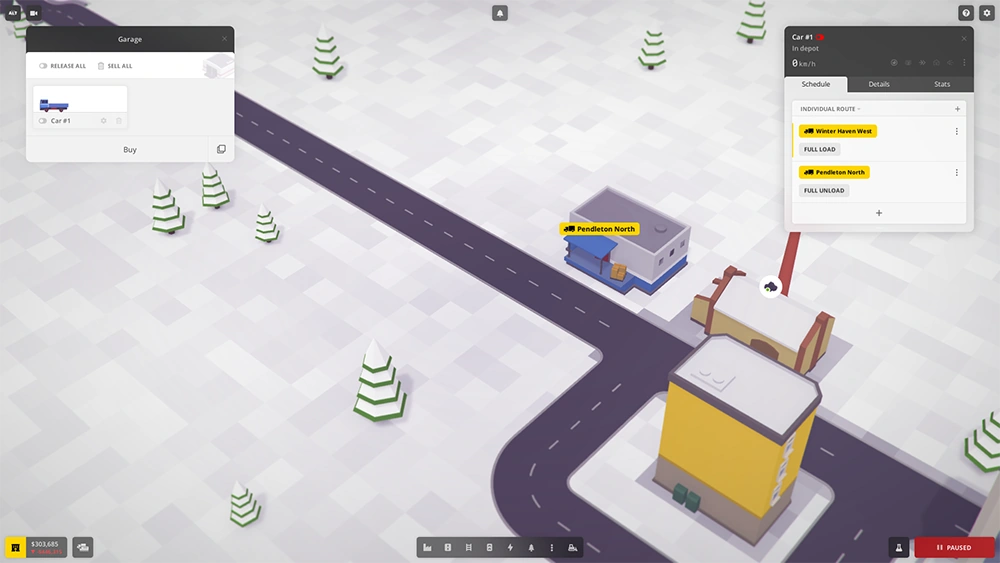
Repeat the same process at the destination truck loading station and select the Full Unload option.
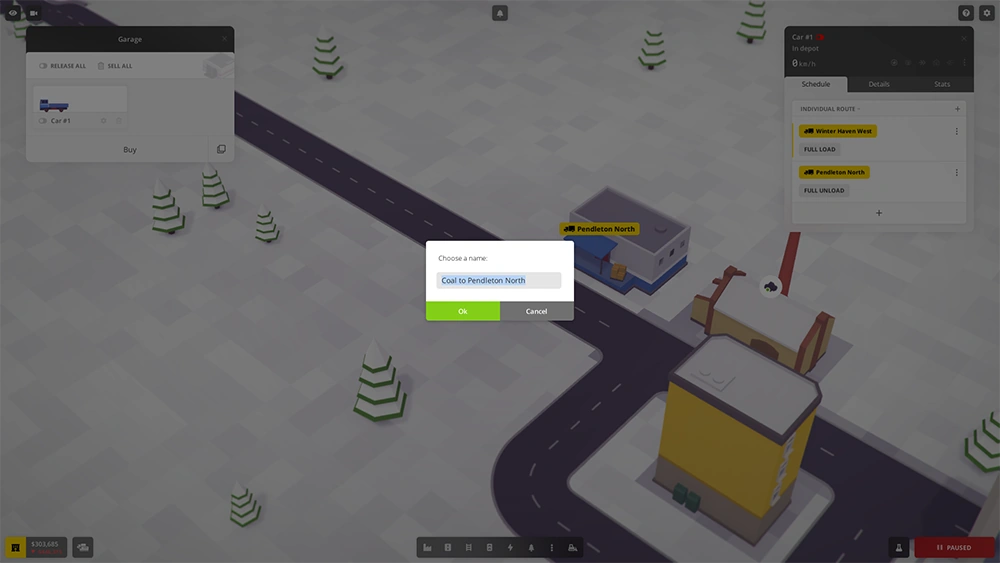  naming the route |
To easily manage truck lines, we can give the line a name. At the top of the Schedule tab it shows that the route created is individual. Click on the plus icon on the right to open the window to choose a name for the line. By default the game creates a name. Accept the name and press Ok.
  Routes list |
Now the name of the line we have created appears at the top. Setting the name of the route is useful if we want to add a new truck on the same line. It is enough to select the name of the line so that the new truck makes the same journey without having to re-specify the stations.
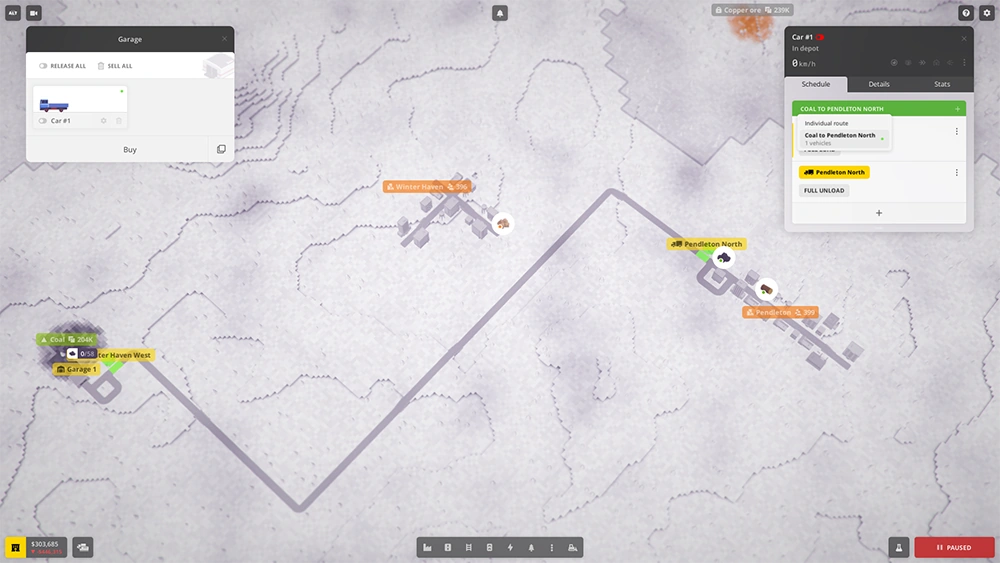  Route overview |
If you zoom out, you will see that by selecting the route in the list, both the start station and the destination station are highlighted with the color of the line created. Each line you create will be assigned a different color.
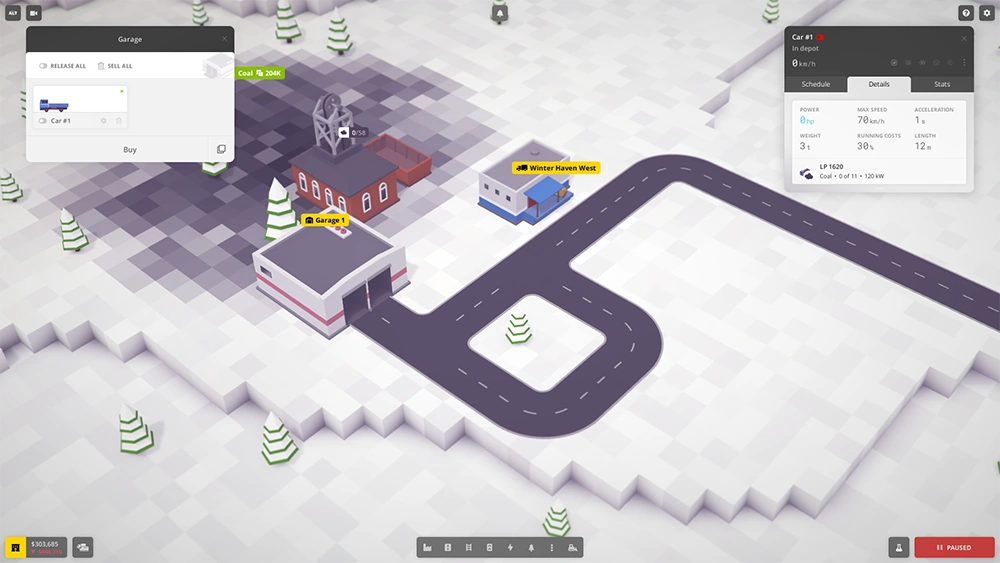  Vehicle details tab in vehicle window |
The truck information window has two more tabs. We have already seen the Schedule tab. The next tab is the truck details tab. In this tab you can see certain statistics in real time such as the power used at all times or how much the truck weighs depending on the amount of cargo it is carrying at that time.
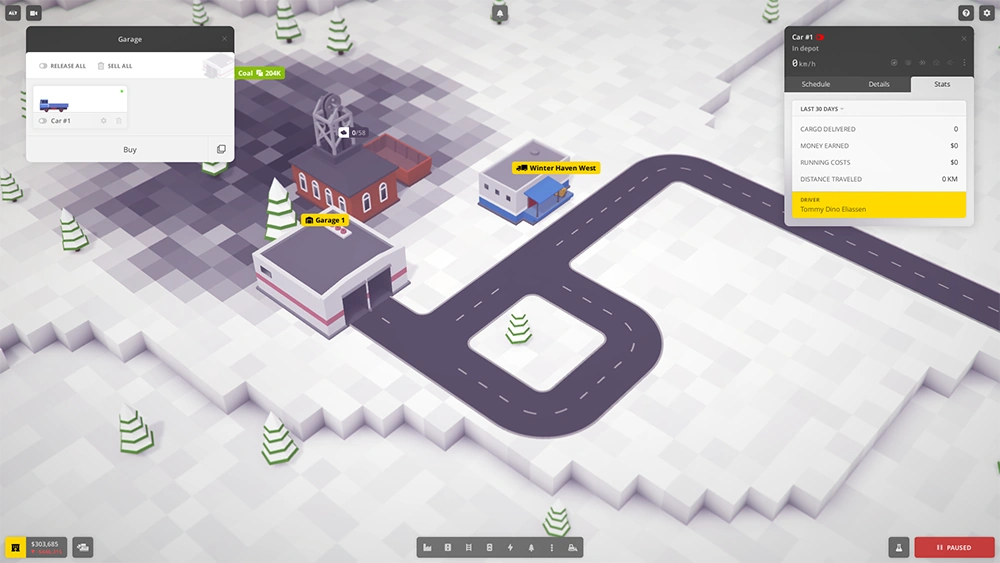  Vehicle stats tab in vehicle window |
The third tab shows the statistics of the truck in the last 30 days or since it was purchased. It shows the amount of cargo you have delivered to a station, the amount of money that have generated by transporting the cargo, the cost of maintenance and the total distance traveled in the indicated period of time. It also lists the Driver of the truck!
  Truck menu in vehicle window |
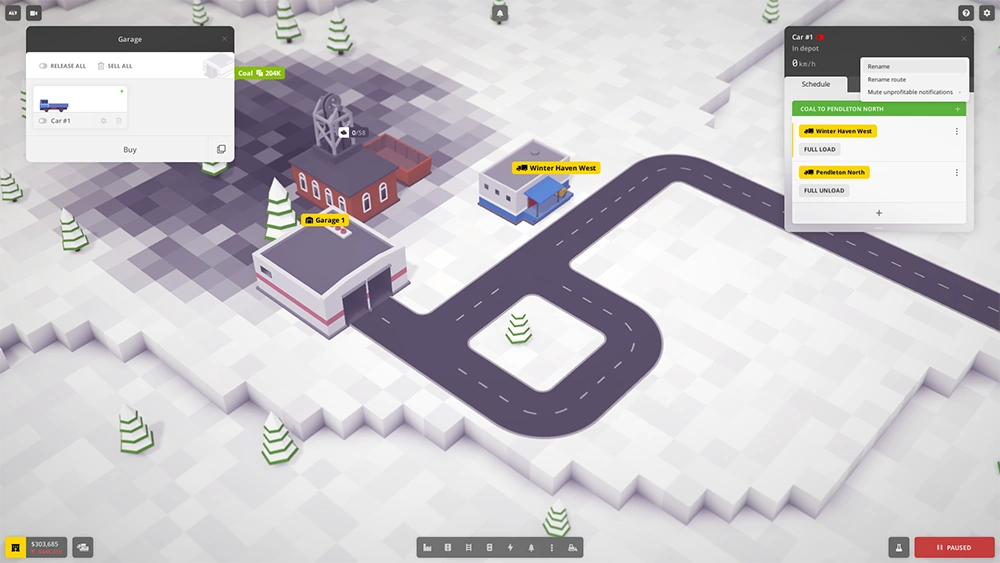
Above the tabs, there are a series of icons that allow you to follow the truck with the camera, take a ride in first-person view on the truck, jump to the next order, send the truck to the warehouse, sound the horn and the last icon with three Dots displays a window where you can rename the truck, rename the route and mute the notifications when the truck is not generating money.
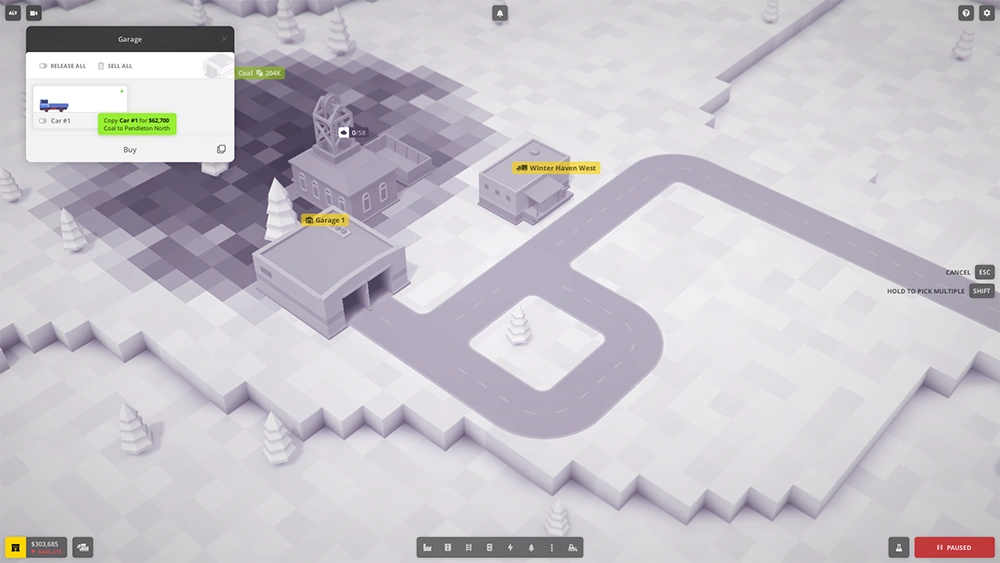  Copying trucks |
Once you have configured the first truck in the line you can duplicate it by clicking on the button to the right of the buy button and holding the Shift key click on the truck as many times as you want to have trucks.
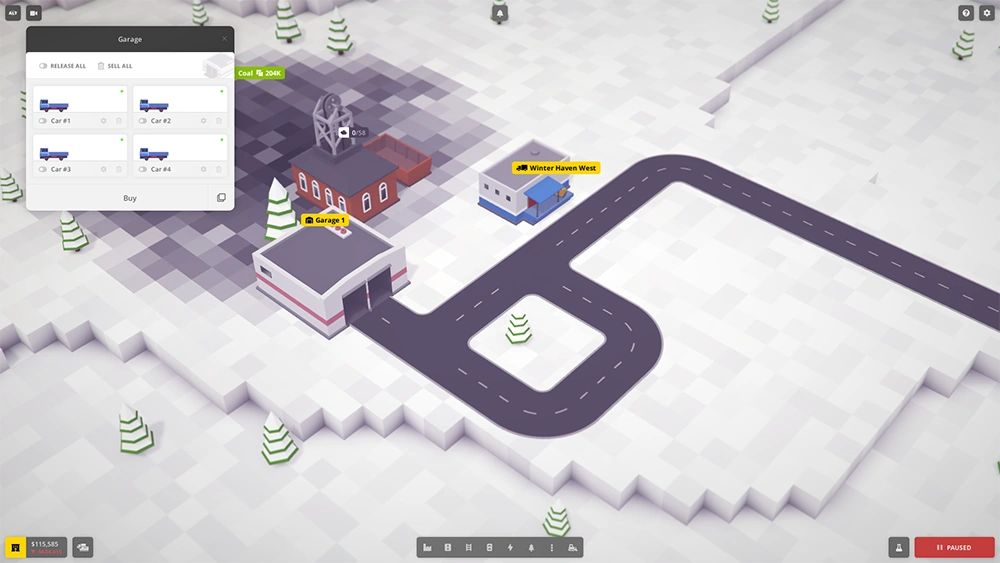  Trucks in depot |
Now that you have the line created and the trucks configured, you can click Release All so that the trucks go out one by one from the depot.
  Releasing trucks |
While a truck leaves or enters the depot, the others will wait their turn to leave.
  Truck route completed! |
Now you have created your first truck route. As the game progresses, demand in the cities will grow and you will need to buy more trucks for the route or even add a new coal mine.